How to create a product page template in Shopify
Create a Shopify product page template in the theme editor, preview it, and assign it to one product or many. Step by step, with real admin screenshots.

Rishi Babu
Before you start: theme, plan and the reason for a second template
Your theme. You can only create templates in the theme editor on an Online Store 2.0 theme, where templates are JSON files. All of Shopify's current free themes are. If Create template is missing or greyed out, you're probably on a vintage theme, or your theme's product template is still a .liquid file.
Your plan. Any plan with an online store, Basic included. We built everything in this guide on a Basic development store with no apps.
The reason. A second template is for products that need a different page, not a different description. Some reasons that hold up:
- A hero product your ads point at, which needs a longer page than the rest of the range.
- A product type with its own questions: a size guide for apparel, a "will it fit my machine?" table for parts, a brew guide for a coffee kit.
- A pre-order or limited drop that needs a shipping date front and centre.
- A range with its own shipping cost or payment options to show under the price, because surprises there are what drag down checkout conversion rate.
If every product needs the change, edit Default product instead. One template is less to maintain.
Create the template in the theme editor
Step 1: Open the theme editor on your published theme
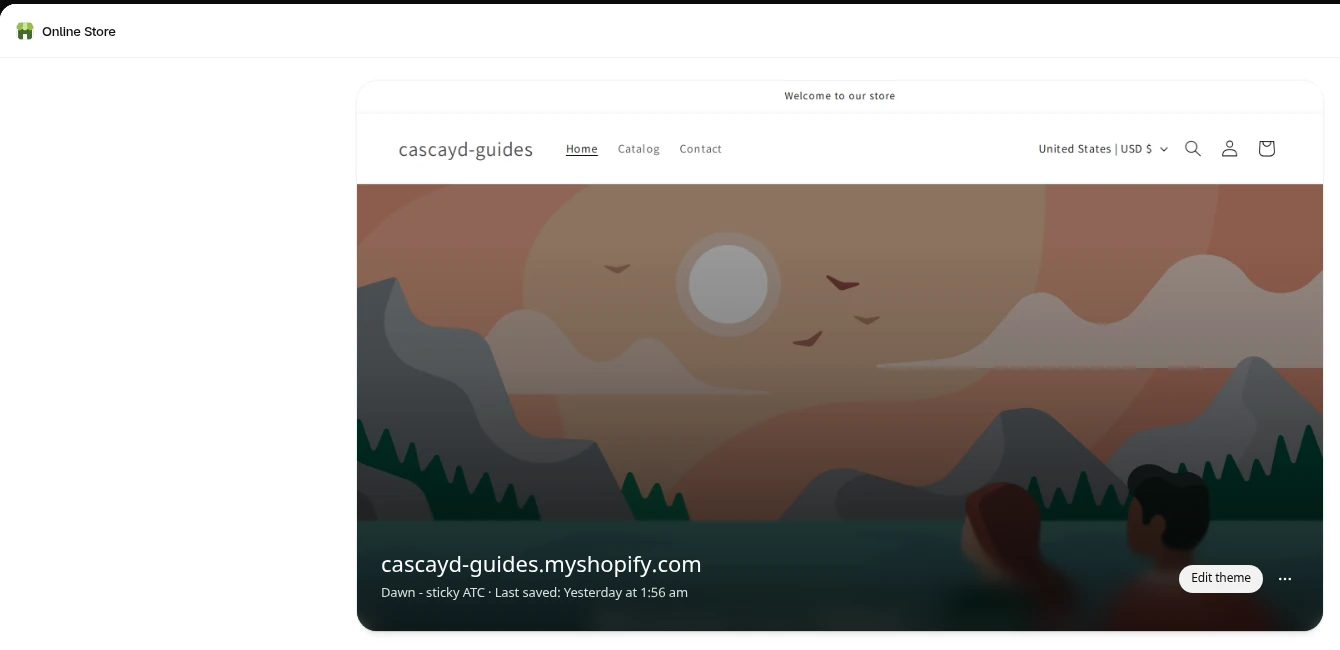
From your Shopify admin, go to Online Store. On your current (live) theme, click Edit theme.
Building on your published theme is the simplest route, because the Theme template drop-down on a product only lists templates from the published theme. Creating a template doesn't change any page on your store, so this is safe. Products keep using Default product until you assign the new one.
Step 2: Choose Products, then Create template
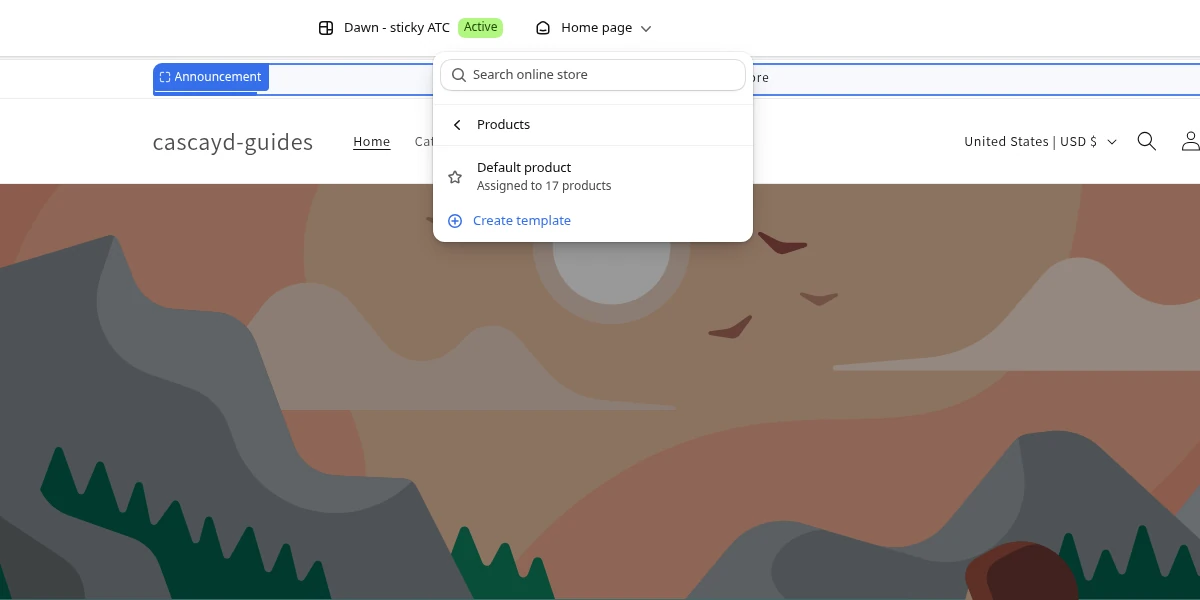
Click the page selector at the top of the editor. It reads Home page when the editor opens. Choose Products. You'll see Default product, with a count of how many products use it, any templates you've already made, and below them, Create template.
Step 3: Name it and base it on Default product
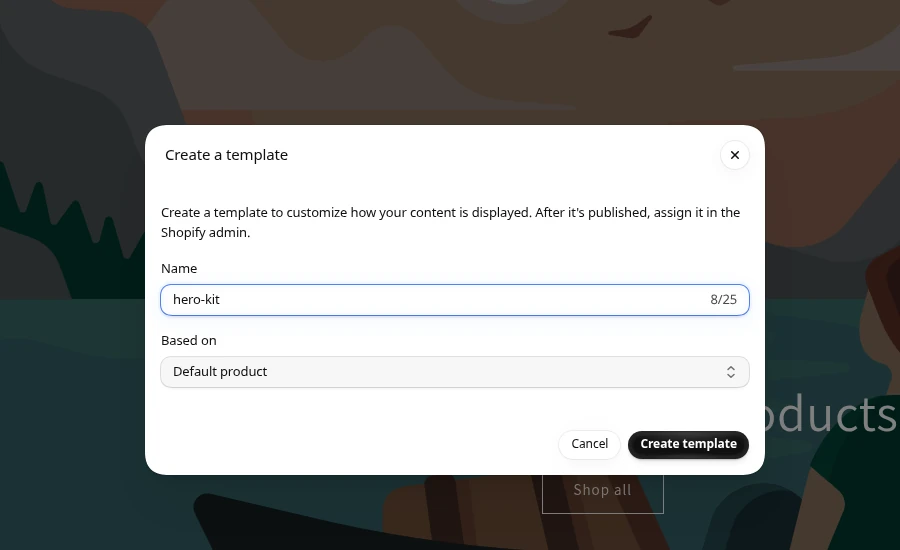
In the Create a template dialog, type a name and choose what it's Based on.
Name it after what it's for, because you'll pick it from a list later. hero-kit, apparel-size-guide or preorder beat product-2. The name field takes up to 25 characters. Shopify saves it as a file called product.hero-kit.json, and that name also becomes the ?view= value in step 5.
Pick Default product under Based on so the new template starts as an exact copy of your normal product page. Then click Create template.
Step 4: Change the sections, then save
The editor opens on the new template. The top of the sidebar shows its name and Assigned to 0 products, so you know you're not on Default product. First, set the preview to a product that will use it: under Preview, click the pencil icon and pick the product. We used the Ceramic Pour-Over Set, which is the product our imaginary coffee brand's ads point at, and where first-time buyers keep asking how to use it.
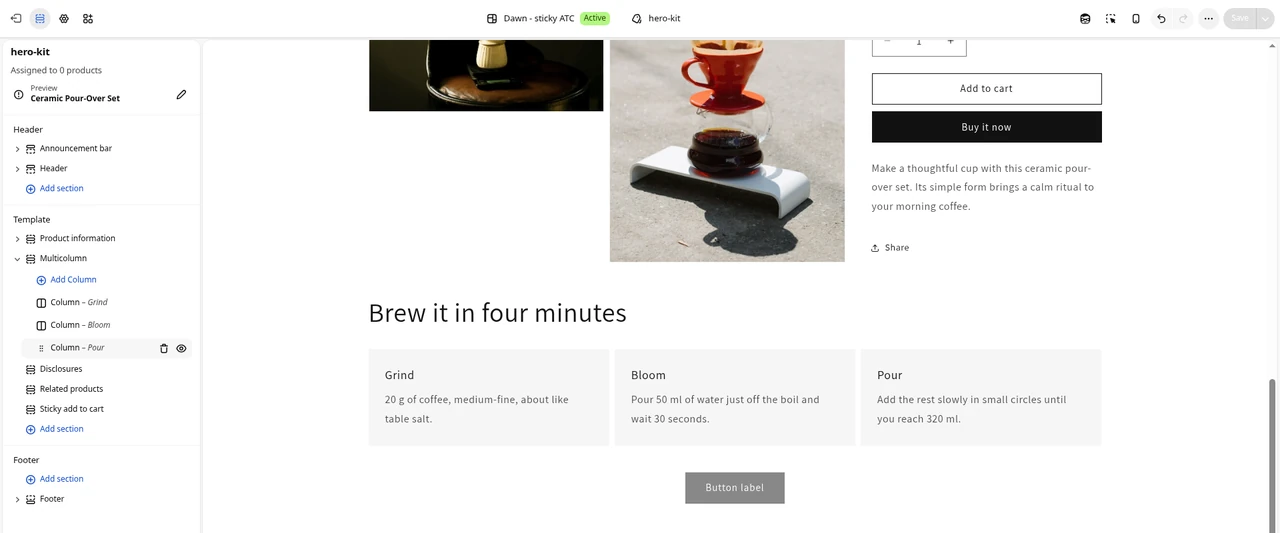
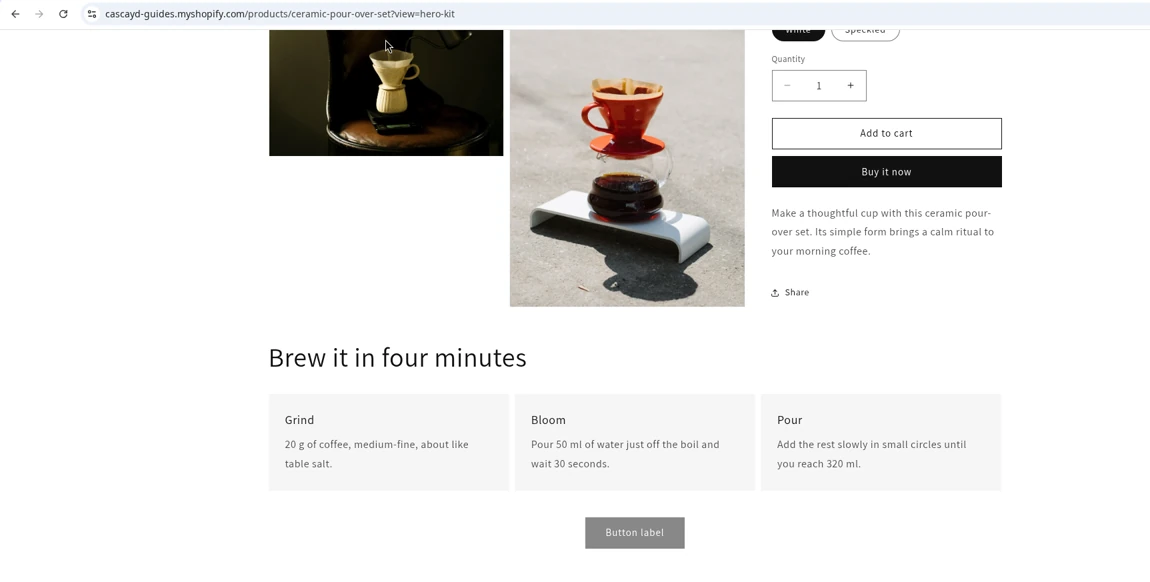
Then make the template different. We added a Multicolumn section under Product information with the heading "Brew it in four minutes" and three columns:
| Column | Text |
|---|---|
| Grind | 20 g of coffee, medium-fine, about like table salt. |
| Bloom | Pour 50 ml of water just off the boil and wait 30 seconds. |
| Pour | Add the rest slowly in small circles until you reach 320 ml. |
Dawn's Multicolumn section also adds a placeholder button that reads Button label. You can see it greyed out in the screenshot at the top of this guide. Clear the label in the section settings if you don't want a button there.
Click Save. These edits only affect products that use this template. Your Default product template, and every product on it, stays the same.
Everything you had on Default product came across, including app blocks and any custom sections. From now on, though, the two templates are separate files. Add a reviews block to Default product next month and the hero-kit page won't get it. You'll need to add it there too.
Preview it before any product uses it
You have two ways to check the template on a real product before you assign anything.
In the theme editor, click the pencil next to Preview to switch between products. You can preview Active and Draft products, but not Archived ones.
On the storefront, add ?view= and the template name to any product URL:
https://your-store.com/products/ceramic-pour-over-set?view=hero-kit
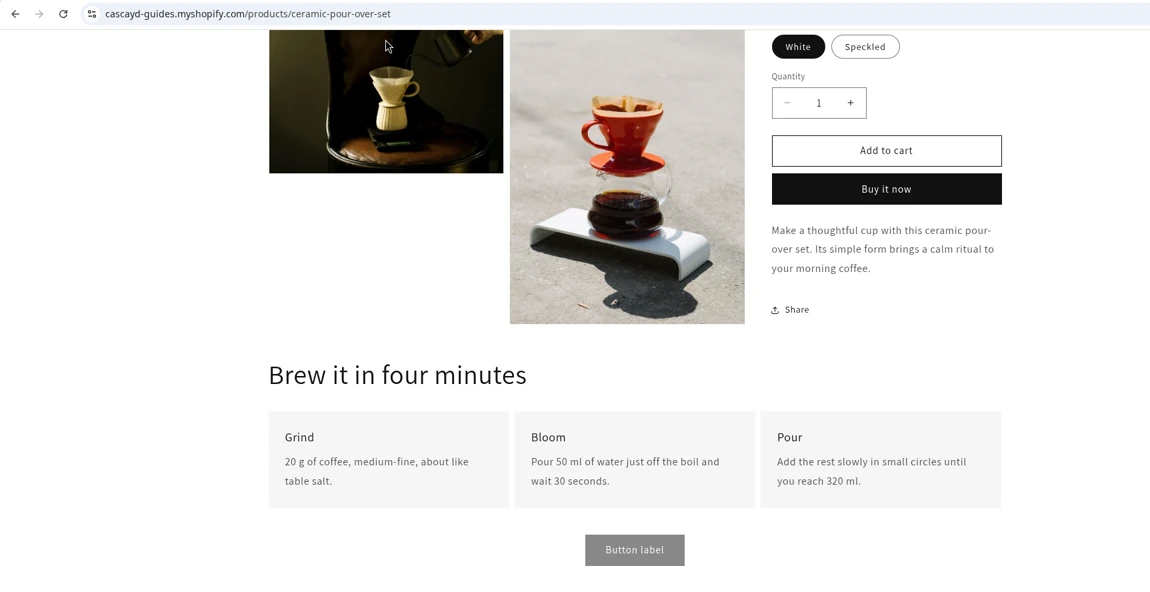
That loads the product with the template applied, in a normal browser tab, so you can check it on your phone. Shopify's developer docs list this view parameter as a way to render alternate templates. Open the same URL without ?view= and you'll see the page your customers still get.
Assign the template to products
Step 5: Assign it to one product
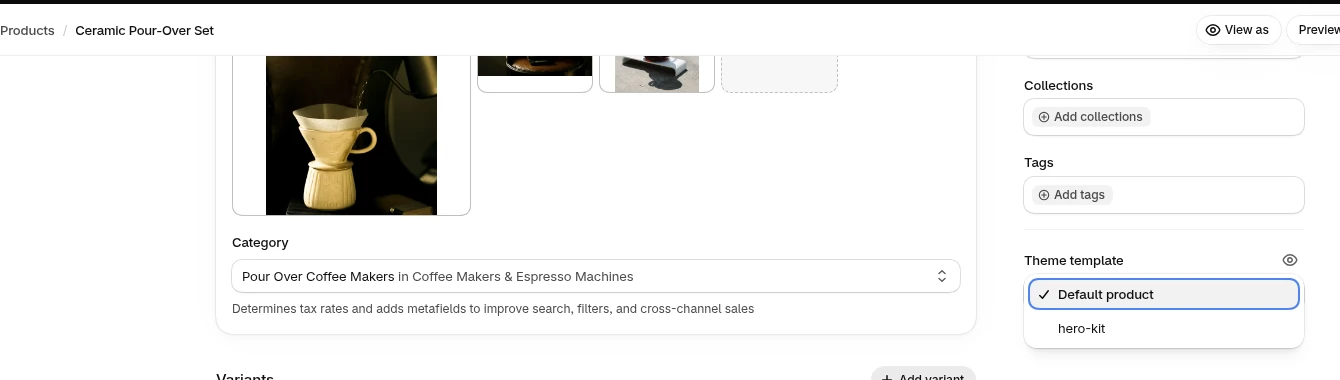
From your Shopify admin, go to Products and open the product. In the right-hand column, below Collections and Tags, find Theme template. Choose your new template from the drop-down and click Save.
The page changes for customers straight away. Open the product's normal URL to check, and open a product on Default product to make sure it hasn't changed.
Step 6: Assign it to many products with the Bulk editor
For a whole product type, don't open 40 products one by one.
- Go to Products and tick the products. To select a run of them, click the first one, hold Shift and click the last.
- Click Bulk edit.
- Open Columns and tick Template.
- Click the first Template cell, hold Shift and click the last, so the column is highlighted.
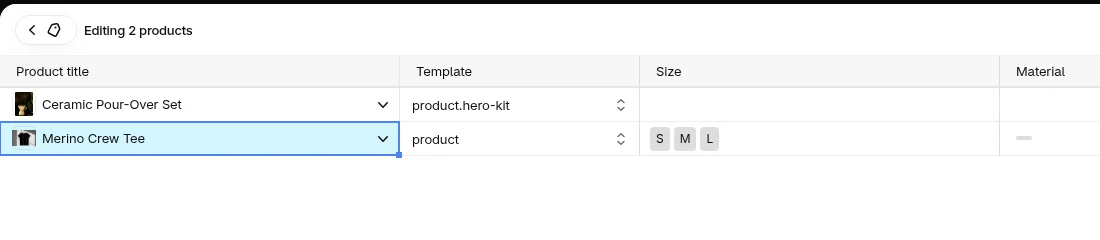
- Click the first highlighted cell, choose your template, and click Save. The Bulk editor lists templates by file name, so hero-kit shows as
product.hero-kit.
To undo, set the products back to Default product the same way. Nothing about the template itself is lost.
When it doesn't work
| What you see | Why | What to do |
|---|---|---|
| Create template is greyed out or missing | Vintage theme, or the product template is a .liquid file, not JSON | Use an Online Store 2.0 theme. Shopify's free themes all are |
| The new template isn't in the Theme template drop-down | It was made on a theme that isn't published. The drop-down only lists the live theme's templates | Recreate it on the live theme, or preview it with ?view= until that theme goes live |
| The page still looks the same after assigning | You're looking at a product on Default product, or the template has no real changes | Check the product's Theme template and reload the product's own URL |
| Reviews, subscriptions or another app are missing on the new template | App blocks added to Default product after you made the copy don't carry across | Add the app block to the new template in the theme editor |
| You need to rename or delete a template | There's no button for it in the theme editor | Online Store > ... > Edit code, then the templates folder. Deleting sends its products back to the default template |
| You're switching themes | Templates live inside each theme | Recreate the template, with the same name, in the new theme before you publish it |
There's also a ceiling of 1,000 templates per store. If you're anywhere near it, the drop-down has stopped being usable long before.
Test the template before every product gets it
A new template feels like progress. Until you test it, it's a guess with your best product attached.
One trap: putting the new template on half your products and comparing them with the other half isn't an A/B test. They're different products with different traffic, and the result tells you about the products as much as the layout. A real test keeps the product the same and splits the visitors, so half see Default product and half see the new layout, at the same time.
Set the rules before it starts:
Not sure what the template should change? The Shopify product page optimization guide covers where product pages lose people, and a sticky add to cart button is a common first change for a long template like this one.
This is the work Cascayd does for Shopify stores with around 40,000 or more product page visitors a month. Our team does the research, the strategy and the creative design, and AI speeds up the build and the grunt work. Each test comes to you in Slack with the reasoning, you approve it before it runs, and every result is judged on revenue per visitor. We only charge when you make money. If you'd rather have your product page tests designed, built and judged for you, book a call.