How to add a size chart in Shopify (no app)
Add a size chart to Shopify product pages without an app: a page with a table, a Size chart metafield and a Popup link block, step by step in Horizon.

Chirag Babu
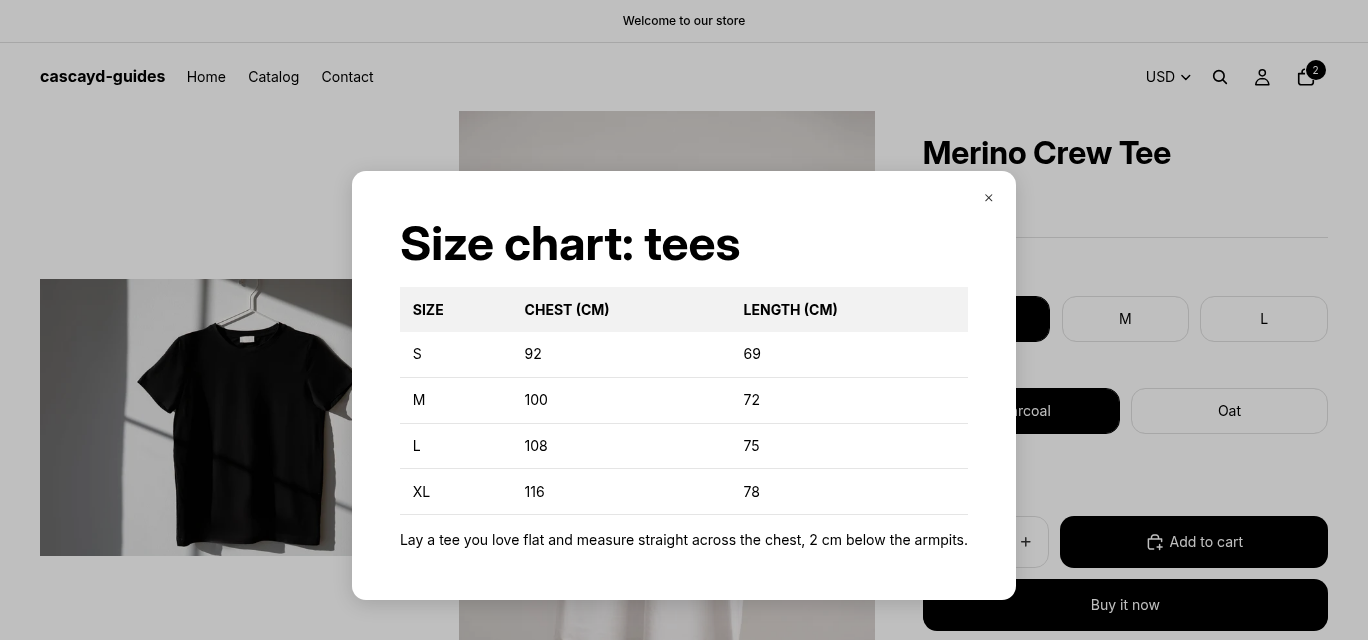
Before you start
Two decisions save you from redoing this later.
One chart or one per product type? A store that only sells tees can use one page and skip the metafield. The moment you sell tees beside trousers or shoes, you need a chart per type, and the metafield is how Shopify picks the right one for each product.
Table or image? Use a table. Screen readers can read it, and you can fix a measurement without opening Canva. Keep it to 3 or 4 columns so it fits a phone screen.
This guide uses Horizon, Shopify's newest free theme. Dawn and the other free themes can do the same job with different block names. In Dawn the block is called Pop-up. Its link field is Link label, and it has its own Page setting, so you skip the Page block inside it.
1. Put the chart on a page
In your Shopify admin, go to Online Store > Pages and click Add page. Give it a short title such as "Size chart: tees". In Horizon the page title shows as the heading inside the modal, so short is better.
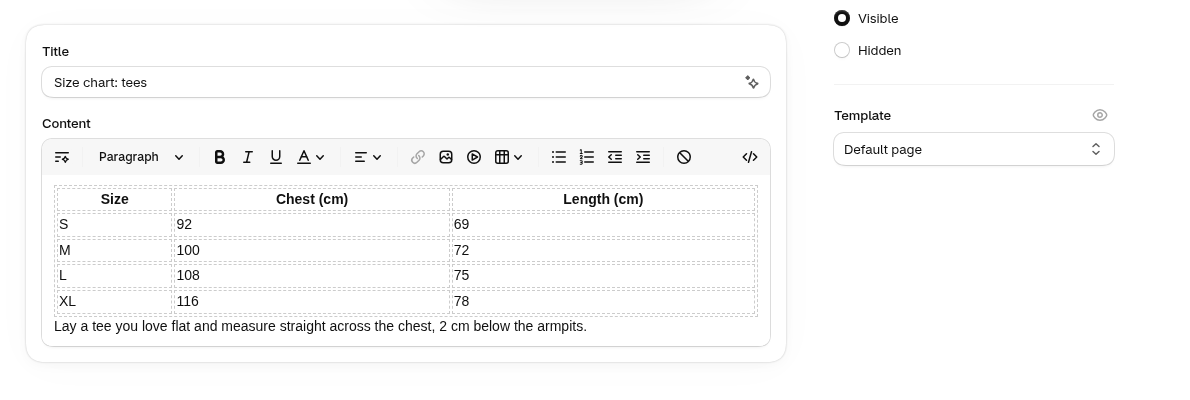
In the content box, open the table menu in the toolbar and click Insert table. Build the table:
| Size | Chest (cm) | Length (cm) |
|---|---|---|
| S | 92 | 69 |
| M | 100 | 72 |
| L | 108 | 75 |
| XL | 116 | 78 |
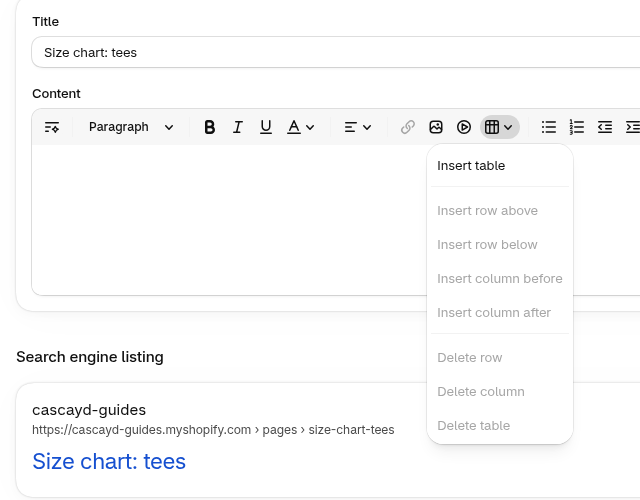
Under the table, add one line on how to measure, such as "Lay a tee you love flat and measure straight across the chest, 2 cm below the armpits." Choose Visible (the other radio is Hidden) and click Save. You don't need to add the page to a menu.
2. Create a Size chart metafield and fill it in
Skip this step if every product shares one chart.
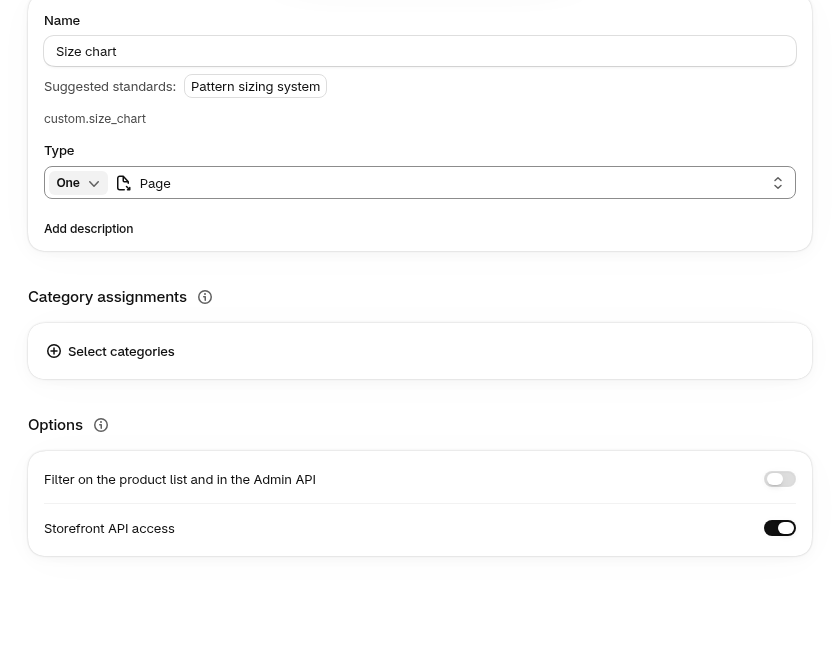
Go to Settings > Metafields and metaobjects. Under Metafield definitions, click Products, then Add definition. Name it "Size chart". Shopify shows the key as custom.size_chart. If Type is empty, click Select type and choose Page, then leave One selected. The Type row then reads One and Page. Under Options, turn Storefront API access on. Filter on the product list and in the Admin API can stay off. Click Save.
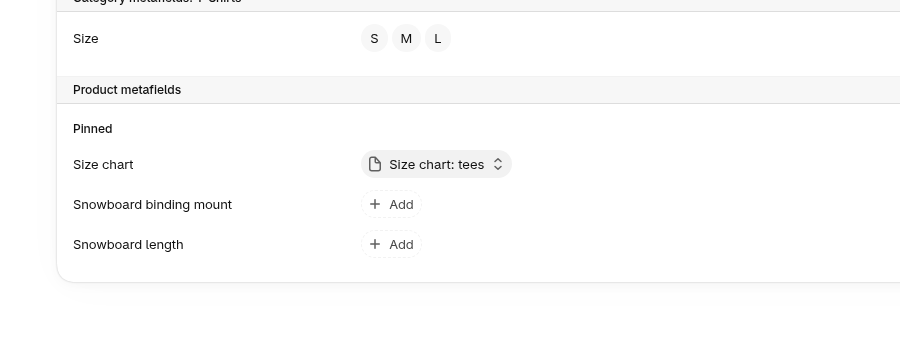
Now open a product that needs the chart. We used the Merino Crew Tee. Scroll to Product metafields. Under Pinned, set Size chart to "Size chart: tees" and click Save. The value shows as a pill with the page name.
3. Add the size chart link in the theme editor
Work on a copy first. In Online Store > Themes, open the ... menu on your live theme, click Duplicate, then Edit on the copy. Switch the page selector at the top from Home page to Products > Default product. Use Preview to open a product that has the metafield set. We used the Merino Crew Tee.
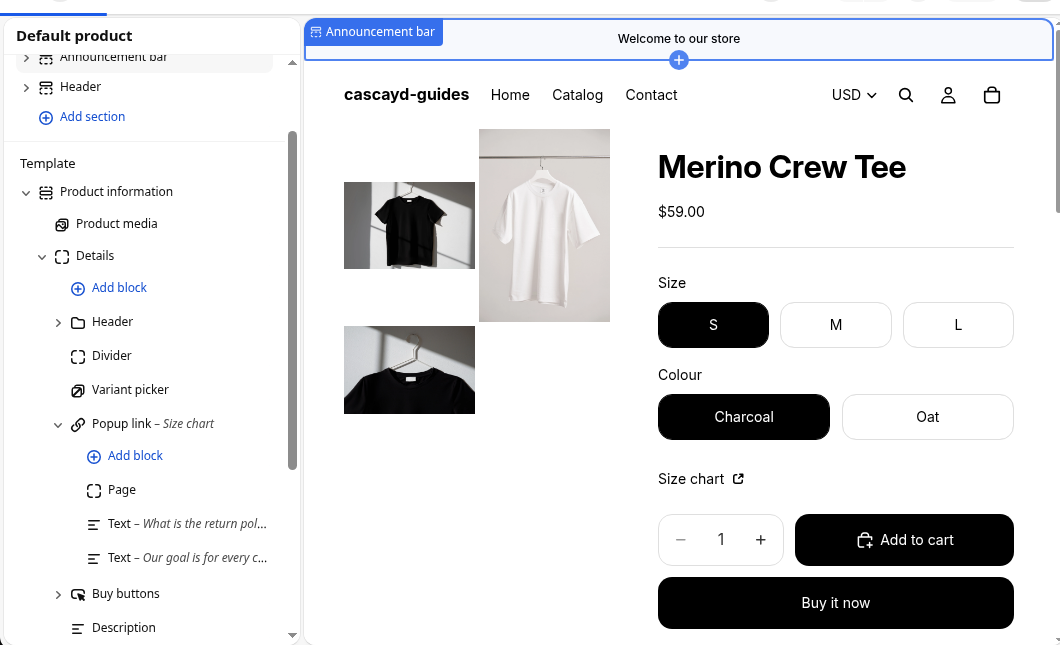
In the sidebar, under Product information, open Details and click Add block. Under Links, choose Popup link.
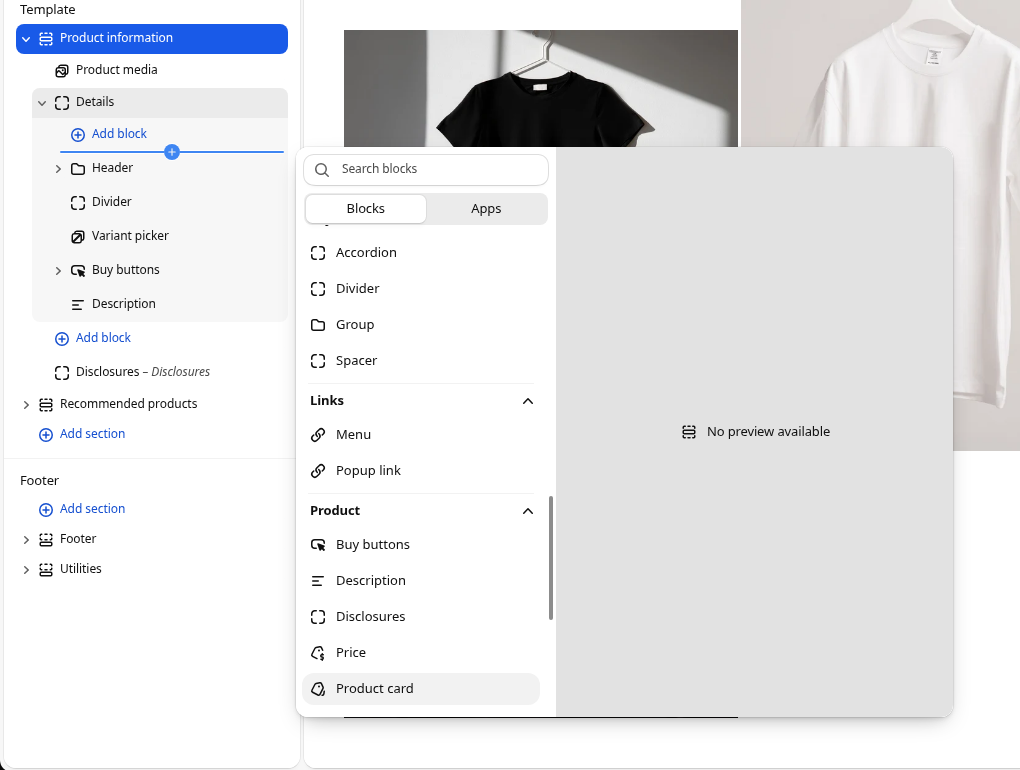
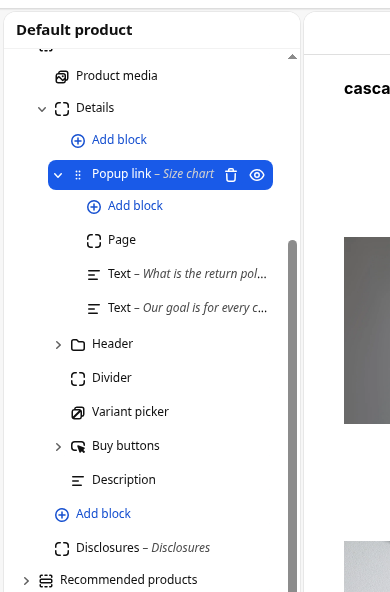
A new Popup link arrives with two Text blocks already inside it. One is "What is the return policy?" and the other starts "Our goal is for every". You will delete both so the modal is only the chart.
The block's own settings are Behavior and Text. Behavior is a switch between Default and Drawer. Leave Default. That opens a centered modal. Drawer opens from the side. Under Link, the field is labelled Text. Set it to "Size chart".
Inside the Popup link, click Add block and choose Page. Then delete the two default Text blocks, so the only block left inside the Popup link is Page.
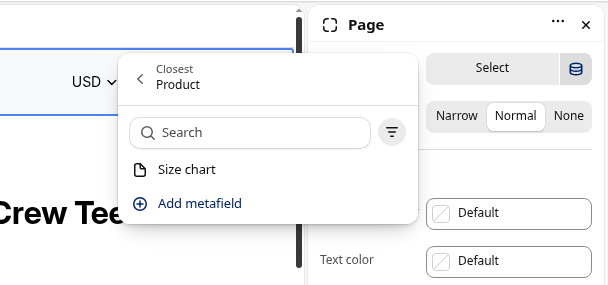
Select the Page block. Its Page setting is a Select button with a database icon beside it. The icon is the dynamic source. If one chart covers every product, click Select and pick the chart page. For a chart per product, click the database icon. The menu goes back with Closest, and the heading is Product. Choose Size chart. The setting then reads Closest > Product > Size chart, with the caption From Product information.
Drag the Popup link so it sits directly under the Variant picker. In the preview it shows under the colour swatches and above the quantity and Add to cart, which is where people are when they pick a size. Click Save.
4. Check it on a product page and a phone
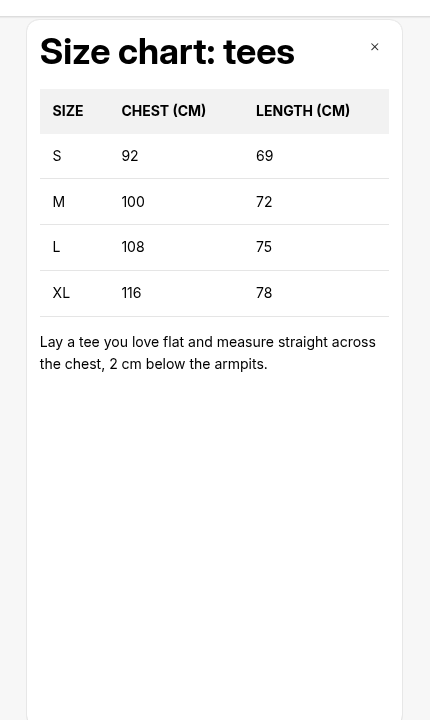
Preview the duplicate theme, open the product and click Size chart. A centered modal opens. The heading is the page title, "Size chart: tees", followed by the table and your measuring line.
Then check it on a phone, or with the editor's Enable mobile preview control. On our test store all three columns, Size, Chest (cm) and Length (cm), fit with no horizontal scroll. The measuring line wraps to two lines. If a wider table is cut off, drop a column.
When it looks right, publish the duplicate theme, or copy the same blocks onto your live theme.
Products without a size chart, and many products at once
A Popup link sits on every product that uses the template. It does not check whether the metafield is filled in. On the Canvas Weekender Bag in our test store, the Size chart link still shows. Clicking it opens the same centered modal with the theme's empty state.
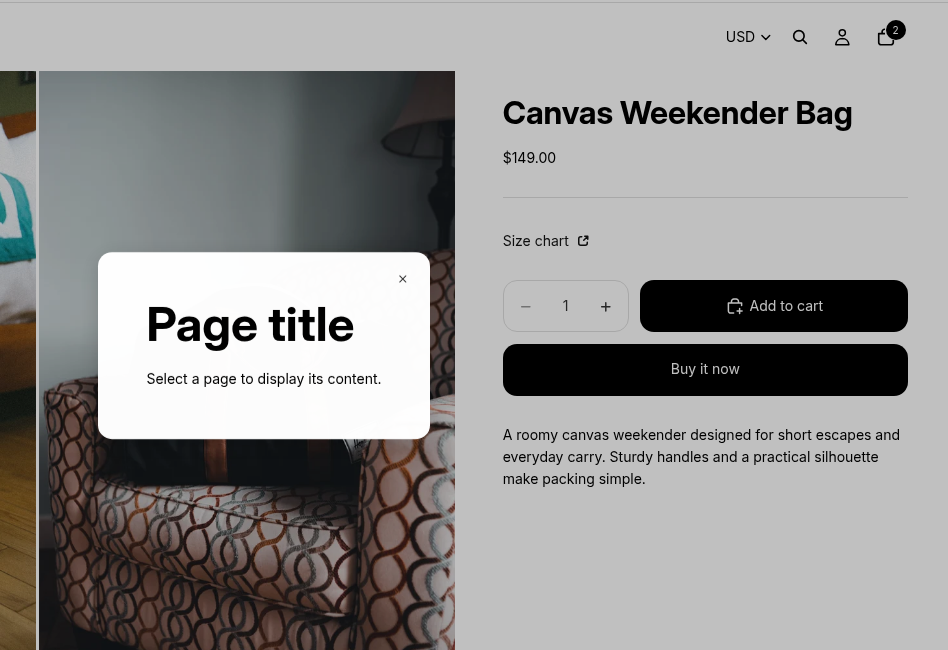
Fix it with a product template. Create one called "size-chart" from Default product, add the Popup link there instead, and assign it only to sized products under Theme template on each product. Our Shopify product page template guide shows those steps with screenshots.
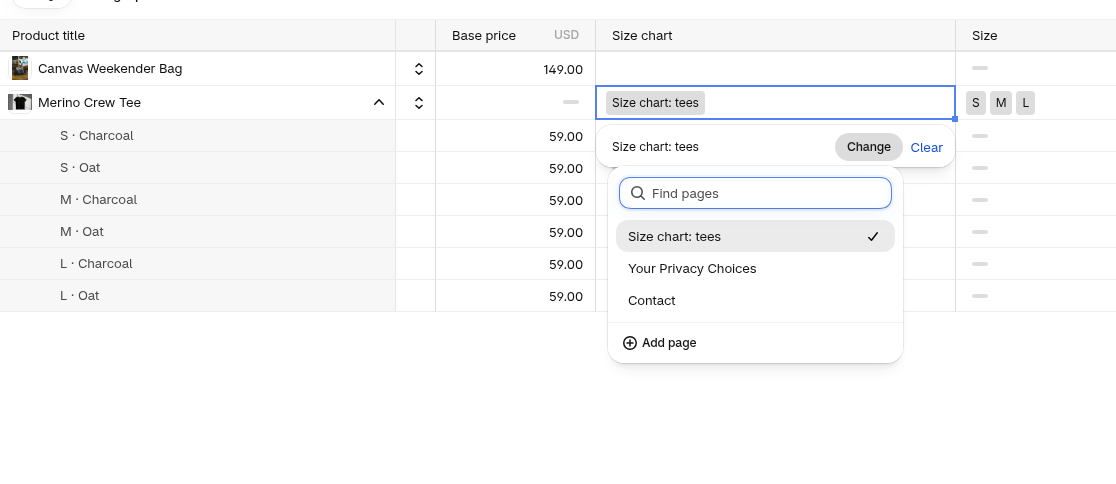
To set the metafield on many products at once, select them in Products and click Bulk edit. Click Columns, search the fields for "Size chart", and tick it. A product that already has a chart shows a pill with the page name. An unset product shows a dash. Click the cell and press Enter. Change and Clear appear. Change opens Find pages, where you pick the chart page.
What to test next
Where the size chart lives and what it says are product page decisions, and they're testable. A link under the variant picker against an open accordion with the table inline. "Size chart" against "Find your size". A one-line fit note ("Runs small, size up if you're between sizes") under the buttons against no note.
Judge those on revenue per visitor, with returns for "doesn't fit" as the guardrail. How to measure lift in an A/B test turns the two revenue-per-visitor numbers into a percentage. A fit note that lifts orders and also lifts returns hasn't won anything. Keep each test to one change so you know which one moved the number.
That's what we do: our team researches your store, designs product page tests like these, and measures each one on real Shopify orders. AI speeds up the build, and you approve every test in Slack. We only charge when you make money. If you're curious whether your size and fit content is costing you orders, book a call.