How to add an abandoned cart discount in Shopify
Add a discount code to Shopify's abandoned checkout email in Shopify Messaging, step by step: create the code, add it to the email, test it and measure it.

Will O'Brien
Before you start
You need a Shopify store with the Online Store or Buy Button channel. Abandoned checkout emails don't go out for checkouts on Shopify POS, the Shop app or third-party channels.
Shopify only treats a checkout as abandoned once the shopper has given contact details and left it unfinished. No email address, no email. So this discount reaches a slice of your abandoned carts, usually the warmest one. Our cart abandonment rate guide shows how big that slice is on your store.
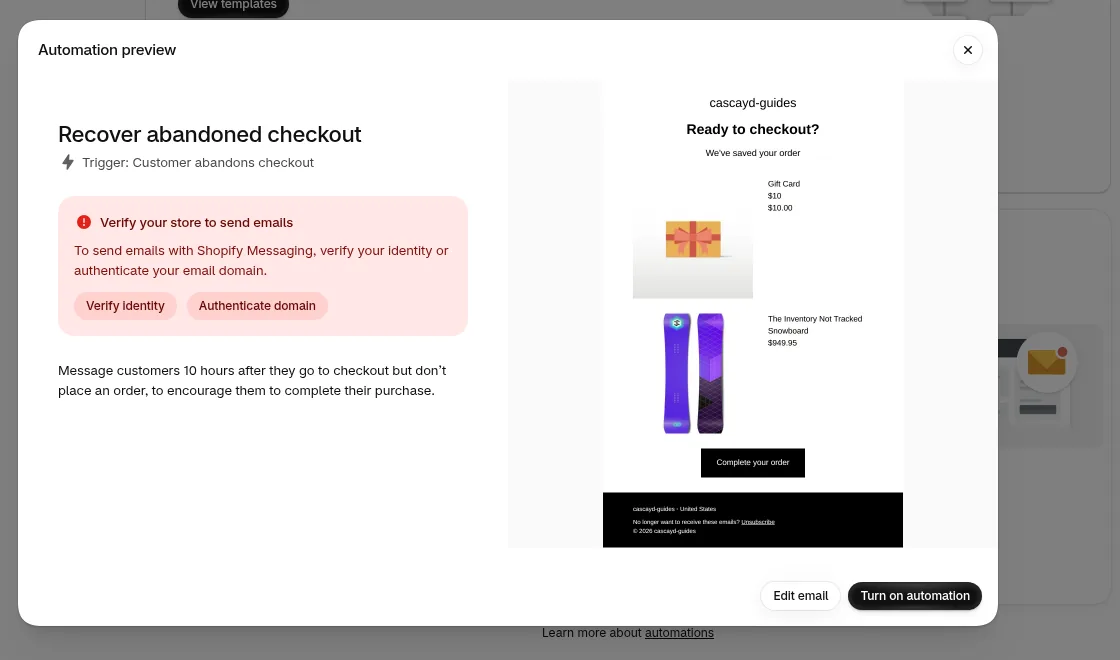
Shopify Messaging also needs your store verified before it sends anything. If you haven't done it, the automation shows a red Verify your store to send emails card: "To send emails with Shopify Messaging, verify your identity or authenticate your email domain." Click Verify identity or Authenticate domain and finish that first. You can build and test the email before you're verified, but you can't turn the automation on.
If you're still on the legacy abandoned checkout email under Settings > Checkout (Send abandoned checkout emails automatically), you can stay there and add the discount with a Liquid edit to the notification template instead. This guide uses the Shopify Messaging automation, where the discount is a few clicks. Switching to it is permanent: Shopify doesn't let you go back to the legacy email.
Step 1: Create the discount code
1. Open Discounts and pick the type
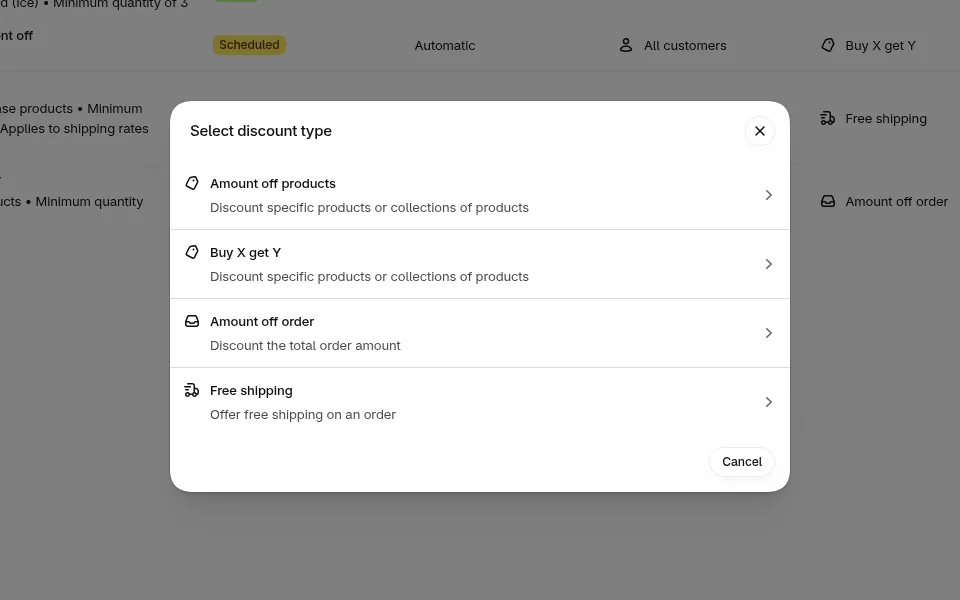
In your Shopify admin, go to Discounts and click Create discount. In Select discount type, choose Amount off order for a percentage or dollar amount off the whole cart. Pick Free shipping if shipping cost is the reason your shoppers bail.
2. Set the code and value
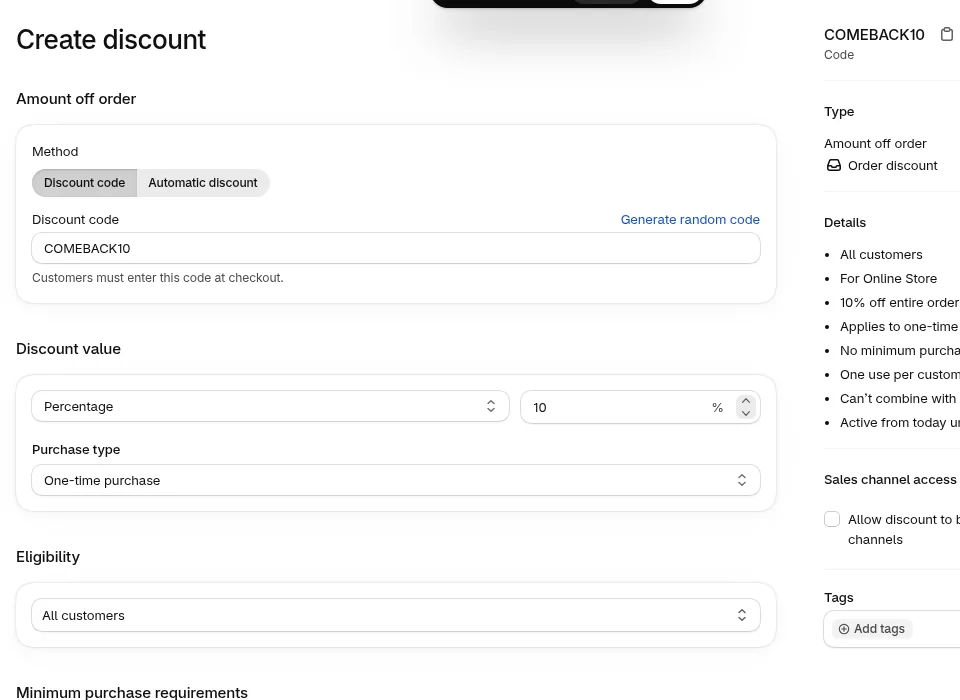
Leave the method on Discount code and give it a plain name with no special characters, like COMEBACK10. Shopify adds the code to the checkout link, and special characters can break that link. Under Discount value, pick Percentage and enter 10. Eligibility stays on All customers.
3. Set the limits and dates
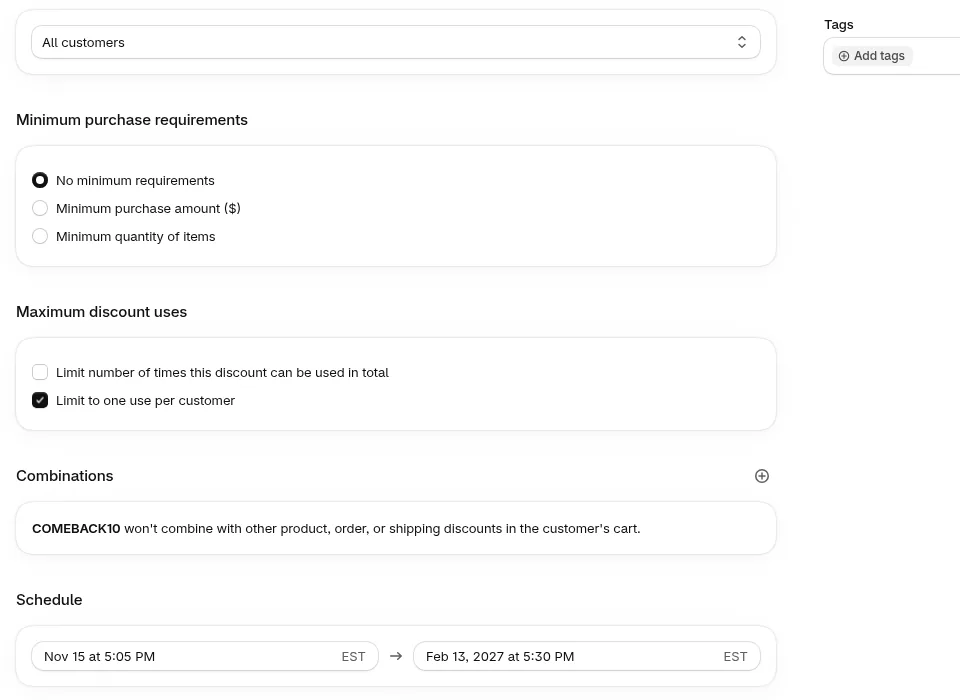
Scroll down and set the parts that stop the code leaking:
- Maximum discount uses: tick Limit to one use per customer
- Combinations: leave them off unless you want it stacking with a sitewide sale. Shopify confirms the code "won't combine with other product, order, or shipping discounts"
- Schedule: set an end date, then swap in a fresh code when it expires
Click Save.
Step 2: Open the abandoned checkout email
4. Find the automation in Shopify Messaging
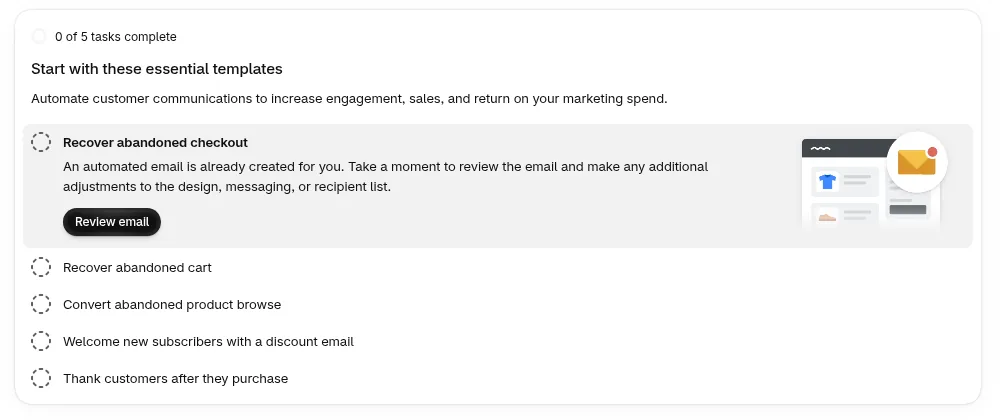
Go to Apps > Messaging and click Automations. Under Start with these essential templates, find Recover abandoned checkout. Shopify has usually created the email for you already, so click Review email.
5. Click Edit email
The Automation preview shows the trigger (Customer abandons checkout), the send time (10 hours after the shopper goes to checkout without ordering) and the current email. Click Edit email. If your automation is already set up, you can also open it and use the ⋯ menu next to the message, then Edit.
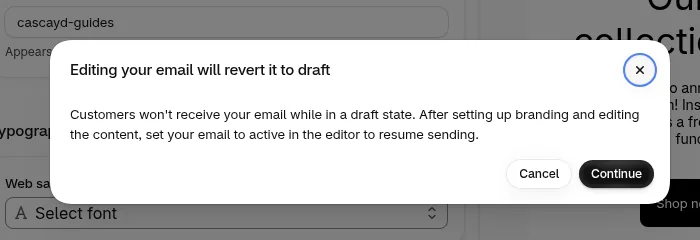
Shopify then warns you: Editing your email will revert it to draft. While it's a draft, customers won't get it. If your abandoned checkout email is live, plan to finish the edit in one sitting. Click Continue.
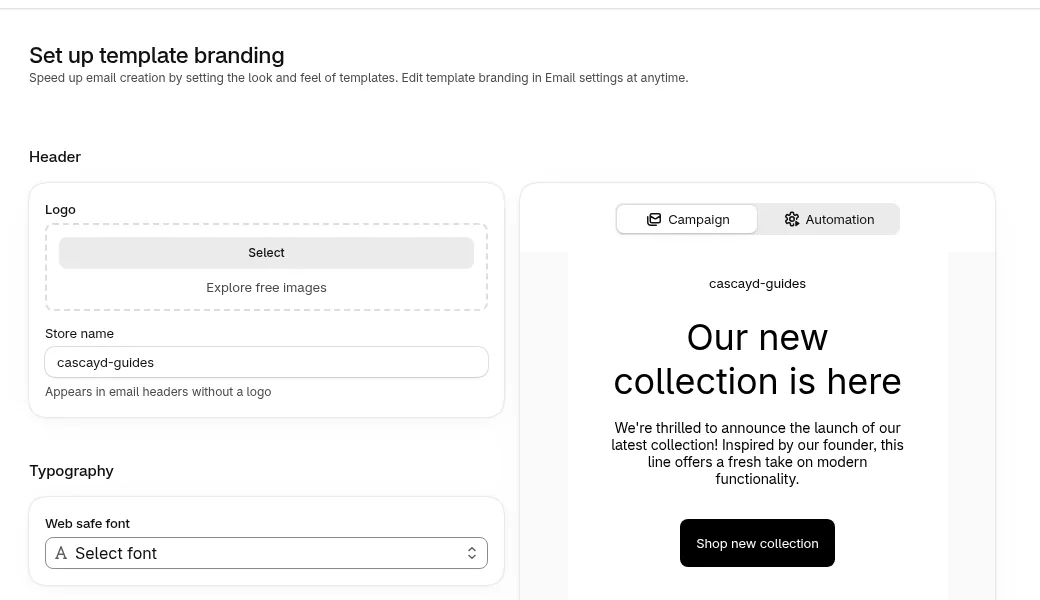
If it's your first Shopify Messaging email, Shopify asks you to Set up template branding (logo, store name, font and colours) before the editor opens. Fill it in once and every template uses it.
Step 3: Add the discount to the email
6. Check who it sends to, and rewrite the subject
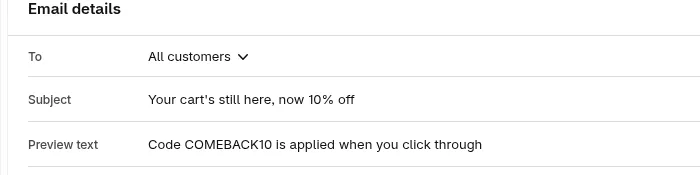
At the top of the editor, Email details has the To, Subject, Preview text and From fields. On our store To was set to All customers. The other option is Customers subscribed to email marketing. Pick the one that matches your privacy policy and local email rules.
Then mention the offer where people see it in their inbox:
- Subject: Your cart's still here, now 10% off
- Preview text: Code COMEBACK10 is applied when you click through
7. Add the Discount section
Click Add section. Discount is in the Product group, along with Product, Collection, Express checkout and Gift card. Select it and pick COMEBACK10.
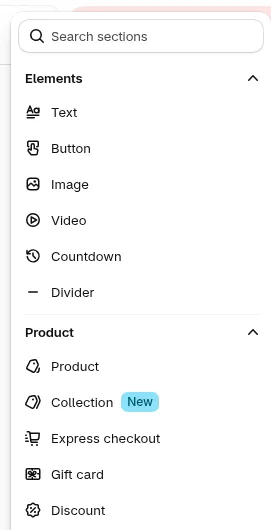
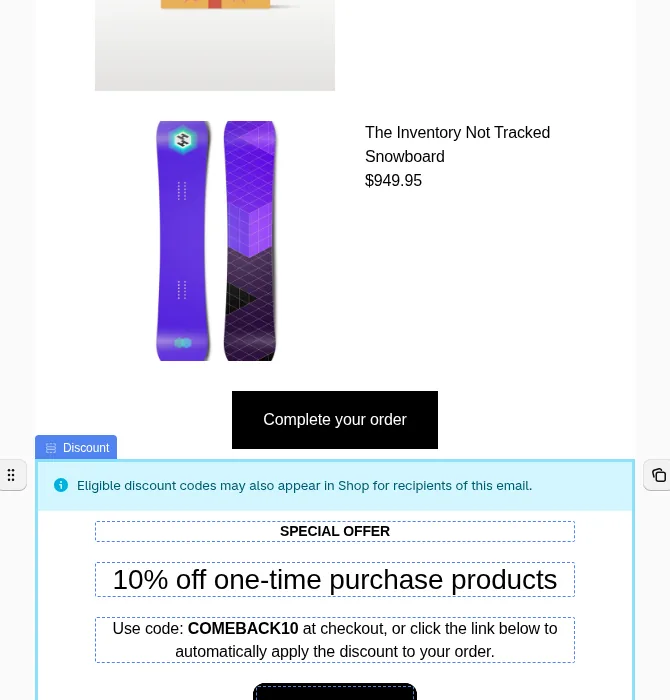
Shopify fills in the section for you: "SPECIAL OFFER", the discount ("10% off one-time purchase products"), a line telling the shopper to use the code or click to apply it, an Apply discount button and the offer dates. It adds the section below the cart products and the Complete your order button. It also notes that eligible discount codes may appear in Shop for people who get the email, which is one more reason for the one-use limit.
8. Change the opening text
The email still opens with "Ready to checkout?" and "We've saved your order", which says nothing about the code. Click the text block above the products and change it to something like:
Still thinking it over? Here's 10% off to finish your order. It's applied when you click through.
Click Save. The email stays in Draft until you set it to active.
Step 4: Test it, then turn it on
9. Send yourself a test
Use Send test in the editor. Shopify sends the test to your store's sender email address. Open it on your phone and check the subject, the opening line, the offer dates and that the Apply discount button is there. Once the automation is live, run one real abandoned checkout of your own to confirm the code lands in the order summary.
10. Set the email to active and turn on the automation
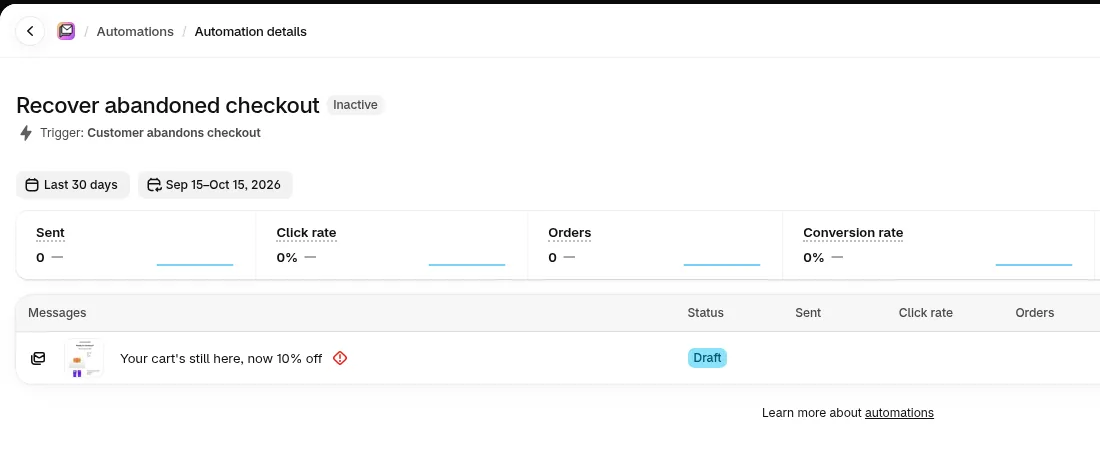
When you're happy, set the email to active in the editor, go back to the automation and click Turn on automation. If your store isn't verified yet, this is where you get stuck: Shopify leaves the automation Inactive, keeps the email in Draft with an alert icon and won't let you turn it on. Go back to the Verify your store to send emails card, finish Verify identity or Authenticate domain, then try again.
11. Optional: discount only a later email
A discount in the first reminder hands money to people who were coming back anyway. A common pattern is a plain reminder first and the code in a second email a day later. On the automation page, Edit workflow opens the automation in Shopify Flow (install the free Flow app if Shopify asks). Add a wait step and a second email there, and put the Discount section in the second email only.
Check whether the discount pays
After a month, open Recover abandoned checkout in Apps > Messaging > Automations and note the email's Sent and Sales. Sales ÷ Sent is your revenue per recipient. Compare it with the month before the code went in.
Then check margin. A 10% code that lifts revenue per recipient from $4.60 to $5.10 can still leave you with less profit per email, because it also discounts the shoppers who would have bought anyway. If you want a clean answer, hold out a random group that gets the plain email and compare the two over the same weeks.
Some carts are lost before an email can help. If shoppers leave because the shipping cost shows up late or the delivery date is hidden, the fix lives on the cart and product page. That's what we test: Cascayd's team researches your store and designs the tests, AI speeds up the build, and you approve each one in Slack. Every test gets a sample size worked out up front, runs at least two weeks and is judged at 95% significance. We only charge when you make money. Book a call.